Stampin' Up DBWS and Blog

**** Link to my Stampin' Up website to order on-line, see current promotions, and see the schedule of events.
http//www.stampinfunwithlynne.stampinup.net


Visit, like and share my facebook page for more fun stamping information:
Lynne Peters, Independent Stampin' Up Demonstrator


I am having issues posting the mini and Sale-a-bration catalogs and their links to the right hand side. Please visit my website to view the catalogs. Thank you.

Monday, February 26, 2018

MONDAY

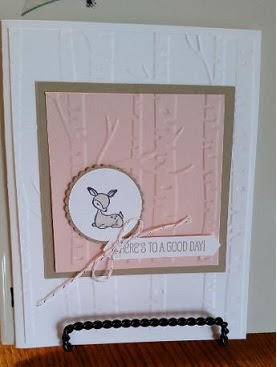
Just an easy post today.  I have been working on mounting swaps to help clear out my stash.  I mounted these, put messages inside and added envelopes to use in our card ministry at church.
I also made a few new ones using some cardstock I had cut for another project.
I am feeling accomplished!


Friday, February 23, 2018

FUN FOLD FRIDAY

I am getting an early start on making some calendar favors for my sorority banquet in April.
We have a theme each year and this year's was In Touch with Tomorrow.  Here is a pic of the final product and then some pics to show you how it was assembled.

The yellow rose is our flower.  This is from the Petal Power stamp set.  I colored with Stampin' Blends and went over the flowers with the Wink of Stella, which is hard to see here.

To create the base, you need a c.s. piece cut at 4 1/4 x 11, scored at 5 1/2.

For the "box" to hold the post- it pad, the c.s. measures 5 x 3 1/4.
Score at 1/2" and 1/4" from 3 sides (1 long side and 2 short sides.
Cut your corners out and cut on the score line of the top of the square piece, into the inside score line.

Put Tombow Glue or Fast Fuse on the 2 square pieces and Glue Dots on the ends of the bottom rectangular piece.  You can use Tomob Glue for everything, but I like that I didn't have to spend any time "holding" the pieces together for a little bit since I had so many of these to make.

Fold your ends in and adhere together to make the bottom of your box.

This is what your "box" should look like.  Add Tombow to the edges and adhere to the center and bottom of your black c.s. base.

To make the base so that your calendar stands up, cut a piece of c.s. at 2 3/4 x 4 1/4. 
Score on the short side at 1/4 from each side and 1 3/8 (the middle of the piece)
Mountain fold the middle score and valley fold the end scores.

Attach to the inside of your c.s. base with Tombow.

There is room in your "box" to also place a pencil so that you have one handy for note taking.
This seems like a lot of steps, but once you get going, it is not hard.
I hope you will have time to make one for yourself or for a gift for a friend.


Wednesday, February 21, 2018

WEDNESDAY

Here are a few more cards using the A Good Day Stamp Set and matching scallop punches that I showed you on Wed.


Three more quick, easy, but cute cards.  I changed the deer card to green instead of pink and it was a perfect card for a guy.

Monday, February 19, 2018

MONDAY

 Here are some cute and simple cards using the stamp set A Good Day and the matching Scallop Circle Punches found on page 17 of the Occasions Catalog.


Lots of products used on these cards - DSP, punches, and ribbon.  My favorite embellishment is the Tutti-fruitti Sequins that have adhesive on the back - no need to use any other adhesive!  These would be favorite cards for a beginning stamper or a seasoned stamper who wants quick and easy.  All the coloring was done with our Stampin' Blends.
Come back Wed to see 3 more samples.


Friday, February 16, 2018

FRIDAY

Posting a picture of items I put together to donate to a scrapbooking Craft for a Cure Event held here locally.  The money raised goes to the Juvenile Diabetes Foundation.  The local organizer has a grandchild with this disease.  Thanks to Martina for her work in this endeavor.

The auction item includes the Perennial Kit box filled with 16 birthday cards, a little crate filled with candy kisses, a mini pizza box filled with 4 notecards, a small luminary, and a card front to be mounted and used for a special occasion, which is held up with a small decorated tile.  I will share one with you on Monday.

Wednesday, February 14, 2018

WEDNESDAY

HAPPY VALENTINE'S DAY EVERYONE!

Just wanted to show you the awesome Paper Pumpkin Kit we got last month.  I have had mine done for a while, but now they are ready to hand out.  This kit had all the supplies to make 16 of these awesome holders.  I already gave 4 to my grandkids.


You could use them as a card or to hold money, gift cards, or candy.  You could also turn them into something completely different, which is what many people choose to do. I love just making what they suggest so I don't have to do a lot of extra thinking!
Here is a video to show you how easy these are to put together.

Want to get in on the fun of Paper Pumpkin?  Click on the link at the right of the blog to get all the details.  Now is a great time to place a 1, 3, 6, or 12 month order.  If you subscribe for three months, you will automatically be eligible to receive a FREE Sale-a-bration item.

Subscribe now through March 10th to receive the March kit, which is to have a special little freebie inside and a specially designed box to celebrate the 5th anniversary of Paper Pumpkin.

You can also join the facebook page here where people show the different creations they have made using Paper Pumpkin supplies.

Let me know if you have any questions.  Enjoy your special day.


Monday, February 12, 2018

MONDAY

Yes, it is February, so here is a card front I made to send to my stampers and customers to wish them a Happy Valentine's Day, remind them of important upcoming dates, and touch base if I haven't seen or heard from them for a  while.

The heart border and the message are embossed with gold.  I used the Painted With Love Specialty DSP for the heart.  This paper is so gorgeous!  It has gold woven into the design on one side of all the sheets.  The stamp set is Sure Do Love You from the Occasions Catalog.
I also used the Calypso Coral Sal-a-bration ribbon, Rich Razzleberry card stock for the leaves, and Wink of Stella on the leaves for a little more bling.

Thursday, February 8, 2018

THURSDAY

An extra post today since I have been absent and also to let you know about the special beginning today.

The Fast Fuse 5-Day Sale Is Here!
As you may remember, the response to our Fast Fuse promotion last fall was phenomenal. In fact, your enthusiasm was so overwhelming we simply didn’t have the inventory to keep the deal running! So, as promised, we’re bringing back the Fast Fuse Adhesive deal for five days only—while supplies last! For those of you who are unfamiliar with this promotion, here’s how it works: When you buy ONE Fast Fuse Adhesive, you’ll get TWO Fast Fuse Adhesive refills for FREE!
This deal will start on February 8  (today) and end on February 12. Remember, that’s five days only—while supplies last! Be sure to mark your calendars and prepare to stock up!
If you want some you may order online at www.stampinfunwithlynne.stampinup.net. You can use Hostess Code UQCJFEVG.

I use Fast Fuse for all heavy duty projects and things that require a little stronger adhesive to stay together well.  It works like a charm!


Wednesday, February 7, 2018

WEDNESDAY

Well, I think I'm back.  New hard drive.  My old hard drive is going to be sent to CA to see if items can be retrieved, so I am starting all over again for now.  UGH!  What a mess!

I am just posting 2 quick pics to get me back in the groove.  Both of these cards were displayed at our Proverbial Stampers Meeting last Thursday.  They both use Brusho.


On the top card the butterfly was heat embossed with gold and then the Brusho colors were added to the butterfly segments.  I am not sure, but I would guess that the Brusho was sprinkled onto something like the Acrylic Mat, the Aqua Painter was dipped into the Brusho and then painted into the sections.  This card uses the Beautiful Day Stamp Set which is a perfect set for this technique.  I am sorry but I do not know who created this card.

The second card was created by Sue Brummer.  I know that because she was the winner of the swap contest.  Brusho was sprinkled on the card after the butterfly was heat embossed. The Brusho was spritzed slightly with water and two of the sections were spread with the Aqua Painter.
Also on this card you will see several Tutti-frutti sequins.  They have adhesive on the back.  Love it!  They are on pg 29 of the Occasions Catalog 
Thanks, ladies, for these beautiful cards.