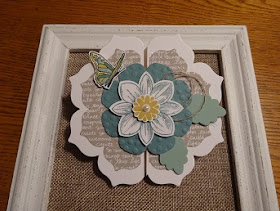
Friday, August 7, 2015

FRIENDLY FRIDAY

I am traveling this weekend with my husband and friends to a music festival upstate.  Today, Friday, we are to wear red to honor all of our military.  So I decided to share this swap I received at convention.


The card uses the For Your Country Stamp Set.  It also uses the Star Framelits, one of the framelits in the Chalk Talk Set, the Small Star Punch, and the Lucky Stars Embossing Folder. 

Unfortunately there is no name on the swap so I don't know who created it.

THANK YOU to all those who have given their service (and some their lives) for this our USA.

Thursday, August 6, 2015

THIS & THAT THURSDAY

This is my roomie's convention swap:


It looks like DSP but is actually the Garden in Bloom Stamp Set.  It is a Two-Step set, which means you stamp the outline stamp and then the fill-in stamp on top of it.  The other cool product used is the very think Metallic Thread.

Thanks, Sondra Jumper, for a great card!

Wednesday, August 5, 2015

WOW WEDNESDAY

WOW!  I won a prize from our leader, Connie Heisey, for my July color challenge entry.  We were to use Wisteria Wonder, Soft Sky, and Early Espresso Stampin' Up colors.  This was my take on the challenge.


I used the Choose Happiness Stamp Set.  The brown is heat embossed and I did that by inking the stamp first with VersaMark and then inking with Early Espresso.  After stamping, heat with the heat gun.  I did the same thing with the bird, using Soft Sky ink.  The dots in the background are from a stamp in the Awesomely Artistic Stamp Set.  Two of the flowers are stamped right on the card stock.  The third flower and the bird are cut out and popped up with Dimensionals.

Can't wait to receive my stampin' prize in the mail!

Tuesday, August 4, 2015

TECHNIQUE TUESDAY

Today's post will show you an easy way to make a watercolor background.  First here is the card I created using the technique and the From Land to Sea Stamp Set.


The colors are Lost Lagoon, Crumb Cake and White.  First I embossed the Lost Lagoon layer with the Decorative Dots Embossing Folder.  To create the water color background behind the turtle:


Take the block size of your choice (here it is Block D) and scribble on it with the Stampin' Write Marker of your choice (here it is Lost Lagoon).


"Spritz" your block with a water spritzer.  This only takes 2 - 3 light spritzes at a distance of about 6-8 inches from the block.


Stamp your block onto your white card stock.  If you place your card stock on your Stampin' Pierce Mat, you will get more even coverage onto your paper.


Here are 2 different looks.  On the left, I spritzed more heavily and I also tilted the block a little to make the water and color "run".  The one on the right is just spritzed and then stamped.


The turtle and the little lantern on the card are colored, cut out, and popped up with Dimensionals.
Try this easy, fun technique and see what you come up with.

Monday, August 3, 2015

MISCELLANEOUS MONDAY

Here is a card I submitted for our Proverbial Stampers' Group July Sketch Challenge.


I saw a similar card posted by fellow demonstrator Crystal Komara and did my take on hers.  It reminds me that summer is still in full swing.


Friday, July 31, 2015

FRIENDLY FRIDAY

A couple of things today since I skipped yesterday:


  • First - A Paper Pumpkin Special for first time subscribers:
           

50% off First Two Months of Paper Pumpkin


If you've never tried Paper Pumpkin, now is a great time-get 50% off your first two months. With a deal like this, you'll want to invite everyone you know to give it a try too!

Offer Dates: July 23-September 10, 2015

Offer Details: Use the code HALFOFF to join Paper Pumpkin before September 10, 2015, and get 50% off the first two months! After that, keep the creativity coming for only $19.95 + tax per month (shipping included).

Click here to go straight to the link where you can order under by name.  This is such a fun program that you can do at home in your own time with grandchildren, neighbors, or friends.  All supplies (except adhesives and clear blocks) and instructions are included, and, of course, you can always do your own thing if you want.  Sneak Peek at Convention showed us that the upcoming kits are really so cute!


  • Second - Here is a post of a card using the Sprinkles Ronald McDonald set and Tree Builder Punch.  It was posted on a board so I don't know who to give credit to.  It is so cute.  LOVE IT!


  • Third - There are new Stamp Camp dates for next week posted on my Stampin' Up' blog.  Click on the blog at the top of the page and view the calendar of events.
Hope you have a great weekend!

Wednesday, July 29, 2015

WOW WEDNESDAY

WOW!  We received some great freebies at convention.  Here is the stash I brought home:


Stamp sets, DSP, great washable felt bag, ink pad, Holiday catalog 8 pack, notebook, twine, make n' takes.

Here are 2 gifts I received from members of our team:

Cute little bag (Sketched Dots Tag a Bag Gift Bags - pg 151) with a birthday theme, made by Debbie Paisie.  There was a cupcake on the outside to hold it shut, birthday cake gum, small post-its, and a cupcake lip gloss.

Such a cute idea, but you can always count on that from Deb!


An adorable scrap bag holder from my roomie, Sondra Jumper.

Thanks to her husband for giving up his jeans.

The flower is made with the Cotton Paper Assortment, which is sturdy, but lightweight.

So cute!


I got lots of swaps, also, and I will be sharing some of those in future posts. Thanks to everyone for their creativity.

Monday, July 27, 2015

MISCELLANEOUS MONDAY

Back from Convention in Salt Lake City.  What a great time.  Loved learning new things, SEEING new things, (some of which you will soon be seeing), and spending time with great stamping friends. This is the gift I made for the group that traveled together for convention.  Figured the box out by myself - definitely a major accomplishment.  I won't tell you how many scrap papers I went through to get there, though.


Thought this was perfect with our new In Color Mint Macaron card stock and ribbon.  I also used new Washi Tape at the bottom.  I will try and post directions tomorrow.

Tuesday, July 21, 2015

TECHNIQUE TUESDAY

Use the new Banner Triple Punch to create a banner effect on your card or other project. The largest banner is 2", the middle one is 1 1/2", and the small one is just the sliver that I cut off my card stock when making my swap.  The third banner size is actually 1", but you can make it smaller just by centering your card stock into the punch like I did for my sliver.


 The banners are made with the colored papers in the Irresistibly Yours DSP Pack.  The card stock colors are Watermelon Wonder and Tip Top Taupe.  The twine is Calypso Coral and it works well as an accent.  The stamp set is the Hostess Set Best Thoughts.  There is Dazzling Diamonds on the flower, but I'm not sure you can see it in the picture.  A little "bling" is always good.

This is my last convention swap.  Finally done!  Now all I have to do is tie up loose ends here at home (always takes longer than I think it will) and pack.  Salt Lake City - here I come!

Monday, July 20, 2015

MISCELLANEOUS MONDAY

Another convention swap for a 3 x 3 group.


I used the Baby's First Framelits Dies.  It is part of a Bundle that includes Something For Baby Stamp Set. I do not have the stamps yet, so I just cut out the pieces with the Framelits.  I drew little lines on the booties with the White Signo Gel Pen.  The little heart on the hanger is from the Owl Punch.  The message is from Teeny Tiny Wishes.  I used one of the stamps in Gorgeous Grunge to make the speckles in the background and the embossing folder is the new Boho Chic.

I have one more general swap that is almost finished and then I AM DONE.  I'll show it to you tomorrow.

Thursday, July 16, 2015

THIS & THAT THURSDAY

Sorry I'm delayed in posting this week.  Busy with convention swaps and life.
Here is a treat holder I made for a Treat Holder Swap.  I love how it turned out.


I will post specific directions in November when I do my 12 Days of Christmas posts.  It does use the Gift Bag Punch Board.  If you need directions now, comment below and I will get back to you.
Can't wait to see what Treat Holders I get back and to share some with you in upcoming posts after returning from convention.

Don't forget to check out the Weekly Deals and new Clearance Rack items.  Click on the links to the right.  Items are while supplies last - some great deals!

Monday, July 13, 2015

MISCELLANEOUS MONDAY

Here is another one of my swaps for convention.  It is for a Very Vintage swap.


I used the Choose Happiness Stamp Set, the Brick Wall Embossing Folder, Circle Framlits, and
Sahara Sand Lace.  My colors are Tip Top Taupe ad Pink Pirouette.  To color the brick wall I just sponged all over after embossing and sponged more heavily in some areas to get an uneven color look.  For the brick card stock layer, I cut it at 5 1/2 x 4 so that I could tear it and then piece it back together by overlapping in the back.  This gave me the look of a crack in the wall.

I am happy with the result.  Can't wait to swap and see what I get in return.

Wednesday, July 8, 2015

WOW WEDNESDAY

Sharing a few things today about the new Watercolor Wings Stamp Set.  Here are some samples of colors used and a card made with the set.  Thanks to Sondra Jumper who demonstrated at our team meeting.


The best way to stamp this set is to stamp the most detailed stamp first and the least detailed last.  It seems to line up better that way.

If I don't post the next couple of days, it is because I am at the LPGA to watch the ladies swing those golf clubs.  We have 2 two-day passes and are excited to go watch - only about 1 1/2 hr from our home.  Hit 'em straight, girls!


Monday, July 6, 2015

MISCELLANEOUS MONDAY

I've been working on convention swaps the last couple of days.  Here is one of the easier ones for a general swap.


I combined several stamp sets to make this card.  The sand and waves are from the Work of Art Set, the water splashes are from the Gorgeous Grunge Set, the lighthouse is from the new From Land to Sea Set, the sun is from Kinda Eclectic, and the message is from Wetlands.  After working on some of the swaps I am doing for specialized swaps, this one was a breeze.

Not sure I will share the others just yet because I don't won't to showcase them all prematurely, but I will share them soon.  Still have two projects to create.

Friday, July 3, 2015

FRIENDLY FRIDAY

Just a quick post doing my take on the American flag using the Work of Art Stamp Set.


As we celebrate the birth of this country, let us send up a prayer for peace and unity.  Our forefathers and those who gave their lives for our freedom deserve no less!  Have a safe and happy 4th of July.


Thursday, July 2, 2015

THIS & THAT THURSDAY

I just saw a post on Pinterest using the new Brick Wall Embossing Folder.  Linda Bauwin created a video to show different ways to use/color the folder for different brick looks.  No need to reinvent the wheel so click HERE to see what she did.  She showed some cool tricks.

Here is a card I just made because I was inspired by her video.


I used the new Awesomely Artistic Stamp Set to create plants on the wall.  I used Mossy Meadow and Wild Wasabi Ink for the ferns and colored the flowers with the Pink Pirouette and Wild Wasabi Markers.  The Cherry Cobbler Butterfly is made with the new Butterfly Thinlet and then I layered a cut out from the returning Butterfly Thinlet in Vellum.

I am going to love this Embossing Folder!  Think of the possibilities.

Monday, June 29, 2015

MISCELLANEOUS MONDAY

Sorry for being absent the last couple of days.  Busy with Vacation Bible School and the church picnic and then my computer went on the blink again when I was trying to post some pictures in my e-mail.
Here is a creation I just finished for our Proverbial Stampers June Color Challenge.  We were to use Crumb Cake, Watermelon Wonder and Cucumber Crush.


I used the Kinda Eclectic Stamp Set, the Bloom For You Single Stamp and matching Fun Flower Punch and the Flower Shop and Petite Petals Stamp Sets and matching punches.  The center of the flower is the Crumb Cake Candy Dot.  I also used Linen Thread.

Don't forget to check out the weekly Deals!  They will end at midnight tonight (MT).  The Mini Treat Bag Thinlet is on sale for $10 off  and I love it.  Here are 2 pics of things made with the thinlet.  You get lots of fun things with this product to give you many creative options.


Click on the Shop Now button on the rigth hand side of the blog to go to my Stampin' Up Website to order.

Wednesday, June 24, 2015

WOW WEDNESDAY

LOVE, LOVE, LOVE this card!  This is another one that was on display at our team meeting.


This is one of my favorite new sets!!  It is the Best Thoughts Hostess Set.  In order to get this set, you only need to place a $150 order by yourself or with a party so you can use your hostess dollars to purchase it.  I KNOW you want to have it, so give me a call, get your friends together and have some fun stamping.  When they place their orders, I know you will have enough in sales to get this set just for you.  I'm already thinking about the fun we are going to have.

Tuesday, June 23, 2015

TECHNIQUE TUESDAY

Today I'm showing off another little bag made with the Mini treat Bag Thinlet.  This bag was on display at our Sat meeting and it is so cute.  I love the cut out on the bag.


Once again, I'm not sure who created this and I apologize for that, but isn't it adorable.  The DSP used here has been retired, but any of our lovely papers will work.  Here is a video to tell you about this Thinlet and how to use the pieces that come with this product.  To get the window, you simply place the cut out shape on the large piece and run it through the Big Shot before you put the bag together.  The "for you" words and the little bow also come with the product and they were cut out with our Gold Foil Paper.
I have made a bunch of these bags, but have not used the cut out and I am definitely going to try it now.

Monday, June 22, 2015

MISCELLANEOUS MONDAY

Here is one of the cards we made at our quarterly Proverbial Stampers Team meeting on Saturday.  Our awesome leader, Connie Heisey, provided us with supplies to make 18 cards as samples for some of our new products.  We had good food, fellowship, saw some great demos, and made cool sampler cards.  


You can be part of this great team by becoming a Stampin' Up demonstrator.  Until the end of June, your $99 Starter Kit gives you $200+ of your choice of product.  This includes two extra stamp sets of your choice that are not usually included in the kit. What a deal!!
Contact me to find out how to do what I do and love what you do.

The above card uses the You're So Sweet Stamp Set, the new in-color card stock Tip Top Taupe and Watermelon Wonder, White Jute Ribbon, and the new In-Color flowers.  To get the little smudge over the words, you just dip your Blender Pen into some of the ink refill and "paint" it over the words.  It gives you an easy watercolor look.

Friday, June 19, 2015

FRIENDLY FRIDAY

Sorry I missed posting yesterday.  Life sometimes gets in the way.
Today's post is a swap I got at our Joyful Hearts Team Meeting.  Not sure who created it.  Sorry!


Another awesome card using the Best Thoughts Hostess Set.  You HAVE to have a party so you can get this gorgeous set.  I LOVE it.

busy with Vacation Bible School next week, so I hope I can keep up with posts.
Have a great weekend.

Wednesday, June 17, 2015

WOW WEDNESDAY

Today's post is a Wow that I have finished for a WOW card fold swap at convention in July.  Here is my take, inside and out:


To see how this card is made, please refer to my April 24th post.  I used a different framelit, but the technique is the same.

Supplies for this card:
Floral Framelits
Butterfly from the Best Thought Hostess Set
Beautiful Bunch Stamp Set and matching Fun Flower Punch (sold as a Bundle, if desired)
Neutral Pack DSP
Leaves from the Flower Flair Framelits


Tuesday, June 16, 2015

TECHNIQUE TUESDAY

One of our new products in the annual catalog is the Color Me Irristible Speciality DSP.  It is similar to the paper that was one of the Sale-a-bration items. The paper is so cool and also has colored sheets in the pack. Here is a card using the paper.


The designs on these papers are glossy.  To get the effect on this card, simply rub the ink onto the DSP with a sponge until you get the color you want.  Here I used Pink Pirouette. Then stamp on top of that with Black Staz On or Momento Ink.  The flower on this card is from the Butterfly Basic Stamp Set.  You could use more than one color in your background also.

After stamping with the Black Ink, I took a tissue and dabbed over top to pick up any black ink that was on the glossy lines so that it would clean off the lines and also not smear on the card.

This card also uses the new In Color Tip Taupe Taupe, which I LOVE.  The lace ribbon is the Sahara Sand and it blends very nicely.

I will show you some of the beautiful colored paper in this pack on another post.

Monday, June 15, 2015

MISCELLANEOUS MONDAY

Worked on cleaning up my stamp room yesterday.  Here's the thing - I have way too many swaps from over the years! I can organize and put away most other things, but swaps are filling up boxes, hiding under my table.  I have to figure out a way to use them in a big way to make a dent.

Here is a swap I found that I think I  got when we had the catalog kick-off event near Baltimore.


This was created by Joszette Cunningham.  It uses the In-Colors Blackberry Bliss and Mossy Meadow.The flowers are stamped, punched out and then layered with Dimensionals.  Punches used are Fun Flower, Pansy and Petite Petals.

Friday, June 12, 2015

FRIENDLY FRIDAY

Here is a card using a cute and versatile new set called Build a Birthday.


This looks like 3 different kinds of Washi Tape but it is actually 3 different stamps.  They can also be used as candles.  Other products used are Linen Thread, Sahara Sand Lace Trim, flower from the Itty Bitty Accents Punch Pack, Pearls and new In-Color Card Stock Watermelon Wonder and Mint Macaron.

This swap was made by Muriel Tukey.

Have a good weekend!

Thursday, June 11, 2015

THIS & THAT THURSDAY

Today's product share is another card made with the Sprinkles of Life Stamp Set and the matching Tree Builder Punch.  This is a card we made at stamp camp this week.


The card also uses the new Boho Chic Embossing Folder.  The ribbon is retired.  Don't you love that little cherry and little bird?!   And the best part is that you stamp it and then can punch it out - no cutting.  You know how spoiled we are with punches.

This set is the new Ronald McDonald Set and $3 of every purchase goes to the Ronald McDonald Charities.  Love the versatility of the set and the fact that we can do some extra good by our purchase.

Wednesday, June 10, 2015

WOW WEDNESDAY

WOW!  Have we got a deal for you, but today is the last day to take advantage of it.

 PAPER PUMPKIN!


If you haven't tried Paper Pumpkin, now is a great time to sign up-get 50% off your first two months. With a deal like this, you'll want to invite everyone you know to give it a try too!

Offer Dates: May 12-June 10, 2015

Offer Details: Use the code SAVE50 to join Paper Pumpkin before June 10, 2015, and get 50% off the first two months! After that, keep the creativity coming for only $19.95 + tax per month (shipping included).
Click HERE to go to the website and register.  It's easy, peasy and so much fun to get your cool, surprise project each month sent right to your home. You have until 11:50 MT to get in on this deal.  Let me know if you have any problems registering. 

Here are all the things we got in this month's kit:


Photopolymer Stamp Set, Ink Spot, 4 printed die-cut bags, 6 printed card bases, 4 sheets of die-cut accents, 8 sheets of tissue paper, 6 envelopes, ribbon trim, Dimensionals.  Now that is a WOW!  And now for your first 2 months, you can get things like this for 50% off.

Here is what the bag and card look like when finished.  Of course, you can do your own thing. 


DON'T YOU WANT TO TRY THIS!!??

Also, don't forget to check out the new Weekly Deals y clicking on the picture on the right of the blog.


Tuesday, June 9, 2015

TECHNIQUE TUESDAY

Today I want to show you a beautiful card created by our Joyful Heart Stampers Leader, Cindy Fodor.  This was a card she created and gave to us as a thank you for demoing at the Sat team meeting.


We all were very curious as to where this background stamp came from.  Well, Cindy took Watercolor Paper and stamped the flower image from the Best Thoughts Hostess Set on it using the Momento Ink Pad.  It looks so perfect.  I definitely have to practice this! The little flower is the new Mint Macaron Blossom Accent.  Cindy dipped the flower into the Versa Mark Ink Pad, then dipped it into Gold Embossing Powder and heated it with the heat gun.  It looks so cool in person! The other little embellishment is the Gold Metallic thread, which is also new.  It is so fine and dainty and adds such a wonderful touch to this card.
Thanks, Cindy.  I LOVE it!  Don't you?

Monday, June 8, 2015

MISCELLANEOUS MONDAY

Well, I needed a graduation card for one of my husband's godsons and this is what I came up with.  I know that both of the sets used are retired, but I keep a few that I think I may still use once in a while (actually I keep MORE than a few - hahaha).  The background Embossing folder is new, however.  It is Boho Chic and I really like it.


The weather held off and the rain left so graduation was a "go".  What a sigh of relief for so many!
Congrats and best wishes to all of those who will soon be starting off on a new adventure in their lives.

Friday, June 5, 2015

FRIENDLY FRIDAY

Today's card highlights the New 2015-2017 In-Colors.  It's quick and simple, but very pretty.


The new colors are Tip Top Taupe as the card stock base and stamped scroll lines; then from left to right for the butterflies we have Cucumber Crush, Watermelon Wonder, Mint Maroon, Delightful Dijon.

The stamp sets used on this card are Chalk Lines and Papillon Potpourri (returning from last year) and Best Thoughts Hostess Set for the words.

Here is what the colors look like stamped on white:


I always hate to see the retiring In-Colors leave, but I always fall in love with the new ones.  This year is no exception.

Have a wonderful weekend.  I will be going to our Joyful Heart Stampers Team Meeting where we will make fun projects and learn about some of our new products.  Be ready for me to share some ideas and new swaps next week.  You can be part of this awesome team by doing what I do and sharing what you love when you contact me to ask about becoming a demonstrator yourself.

Then on to the Chef Walk in our town and Sunday's Rose Rent service at our church where we thank our ancestors for donating the land where our church is built, for just the rent of one rose each year. Pretty awesome tradition!

Thursday, June 4, 2015

THIS & THAT THURSDAY

Today is product day and I wanted to share a couple of new items with you.  Here is the quick card I created to show off some of the products:


This card uses the new Ronald McDonald Stamp Set and the matching Tree Builder Punch.  The stamp set has 22 photopolymer images and is only $21.00.  One of the great things about Stampin' Up stamps is that most come in sets so that you can mix and match your stamps together.  Remember also that when you purchase a Ronald McDonald Set $3 automatically goes to support the Ronald McDonald House Charities.  What a fun and easy way to support a great cause.
Also on this card are two of the new In-Colors - Watermelon Wonder and Cucumber Crush, along with the DSP from the Cherry On Top 6 x 6 Paper Pack.

Here is the stamp set and matching punch:


The great thing about this stamp set and punch is that you can turn these images into cupcakes, ice cream cones, trees or clouds.  Pretty cool, right?!  I love this set and its versatility.


Tuesday, June 2, 2015

TECHNIQUE TUESDAY

The unveiling is here - Stampin' Up's New Annual Catalog! Always so much fun to go through the catalog and turn down the corners of pages that have your "must have" products.  Of course, I have lots of turned-down corners already!

One of our new products is the Gift Bag Punch Board, which I told you I have been playing with.  Here is a picture of the board and things I have created so that I can demo this fun product at our team meeting on Saturday:


"What"!? you say. Yes, all of these items were made with the board.  I love it when a product can be used to make more than one thing - more bang for your buck! And there are many talented people out there who have shared their creativity. For some of the projects I used retired paper, etc since I don't have a lot of new DSP yet. Bags and boxes can be made with DSP or card stock.

Here are the sizes of the 3 bags that the board is intended to make:


The first bag is the small one and it is left open with no tie closure.  It measures 2 3/4 wide by 4 3/4 tall.
The next one is the medium bag and is closed with a bow.  The board punches the holes in the correct
   place for you.  It measures 3 1/4 x 4 3/4.
The last one is the large bag and is closed with a punch, attached with a small Velcro Dot.  It measures 3 5/8 x 4 3/4.

The depth of all bags is 2 " and cannot be changed.  (However, I wouldn't doubt that someone will come up with a technique for that).  You can change the height of the bag, however.
Click here to watch the video of how to make the bags. The product also comes with detailed, printed directions.  Once you have made a few, you will be good to go.

I will be showing some of the other bags and boxes in the coming days and will link you to directions.

Let me know if you till need a catalog and if you are ready to have a party to share the fun of stamping.